Sunday, January 30, 2011

valentine's day mug rug

what a great beginner project!   also a good way to use up those scraps!
you'll need:
four 5x5 squares
one 9 1/4 x 9 1/4 piece for backing
batting 9 1/4/ x 9 1/4
thread
iron
pins
heart template
*1/4" seam allowance unless otherwise noted

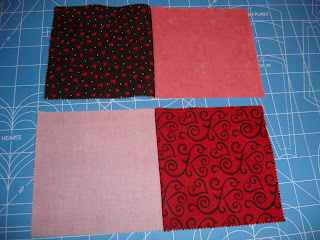
first you'll need to sew your squares together.  press your seams.

next, baste your batting to the wrong side of the backing material.

now lay your fabric pieces right sides together--this means that your batting will be on the outside as you sew.  pin in place and sew, leaving approx 3 inches open for turning.  trim the corners and turn right side out.  press, so that the open edges used for turning are folded in 1/4", then sew around entire piece.  use a 1/8" seam allowance here.

since this is for valentine's day, i decided to quilt some hearts.  using a piece of paper, cut out a heart that just fits the inside of your mug rug.  trace, and sew.  you can now use this first heart as a guide to make a few more hearts!(just line it up with your sewing foot and follow along!)  TAKE YOUR TIME!!  make as many as you'd like, or just "stitch the ditch" around the squares.  when i was finished, some of the basting stitches from earlier were visible, so i just removed them with my seam ripper.

you're done!
need a gift for a teacher??  package with a cute mug(not my ugly rain forest cafe mug!! haha), and a little something sweet! 


we are linking up with:
Thursday, January 27, 2011

Pin Cushions: Bringing Sisters Together!

Tina and I FINALLY had a day where we were able to get together and sew and we made these cute little pin cushions!  Please go HERE to get the pattern and make one of your own!  It is one of those instant gratification projects and great for beginners!

We printed and cut out the pattern:

We Pressed the fabric:

Sewed and pressed and cut some more:

And put all the pieces together!


 As a added touch to go with her fabric, Tina whipped up these cute little cupcake pins!
Now go make a pin cushion!

Wednesday, January 12, 2011

Sweaters for your Pillows!

I LOVE the way these came out!  I had some sweaters in my closet that I haven't worn in a long time, so I thought I would re-purpose them into covers for my icky couch pillows.

My sweaters happen to have zippers on them, so this makes this tutorial even easier!


 The first step is to flatten your sweater out and line up the seams.  Then unzip about 1/4 of the way to make sure your zipper pull is UNDER where you will be cutting.  Using a rotary cutter and straight edge, cut just under the arm pits, stopping at the zipper, I used some heavy duty scissors to cut through the zipper and then continued with the rotary cutter.


Next, turn inside out and take to your sewing machine.  You can pin the edges if you want, I usually don't.  It makes no difference if you sew the top or bottom first, but when you get to the bottom part of the zipper, STOP, back stitch and clip your thread.  Then sew from the opposite end until you get to the bottom of the zipper again, back stitch.  You won't be able to sew through this part so it is necessary to sew into the center from either side.  I hope this makes sense!   When you sew the top portion of the sweater, where you made the cut, just make sure when you get to the open zipper, you put them as close together as you can so that the zipper goes all the way up when we are finished.

Turn right side out through the unzipped hole you made at the beginning.


Now you can unzip all the way and stuff your pillow in!  I was lucky enough to have pillows that fit perfectly, even a little tight, which I think looks nicer.  Then I embellished with broaches (the zipper flower is from an etsy shop) and flowers I made with scraps, including a little lace from my wedding gown!   You can easily find tutorials for fabric flowers just about anywhere.  The best part is that I just used safety pins to attach them, so they can easily be removed when the covers need washing.


And TA DAA!!!  Cute "new" pillows to help brighten up a BLAH winter day!!!


Today's Creative Blog
 Hope Studios
Creative Itch
Little Eme